Serving Online Inference with LMDeploy on Vast.ai

Serving Online Inference with LMDeploy on Vast.ai
Background
LMDeploy is an open-source framework for Large Language Model inference. It is particularly good at high-throughput serving for multi-user or high-load use cases and is one of the most popular serving frameworks today.
LMDeploy provides an OpenAI-compatible server, which means that it can be integrated into applications that use the OpenAI API. This makes it easy to switch from using OpenAI's services to running your own models on more affordable compute.
This guide will show you how to set up LMDeploy to serve an LLM on Vast. We reference a notebook that you can use here.
Performance Benefits:
LMDeploy is specifically focused on maintaining throughput while under higher loads. They include benchmarks where they compare LMDeploy to vLLM on throughput.
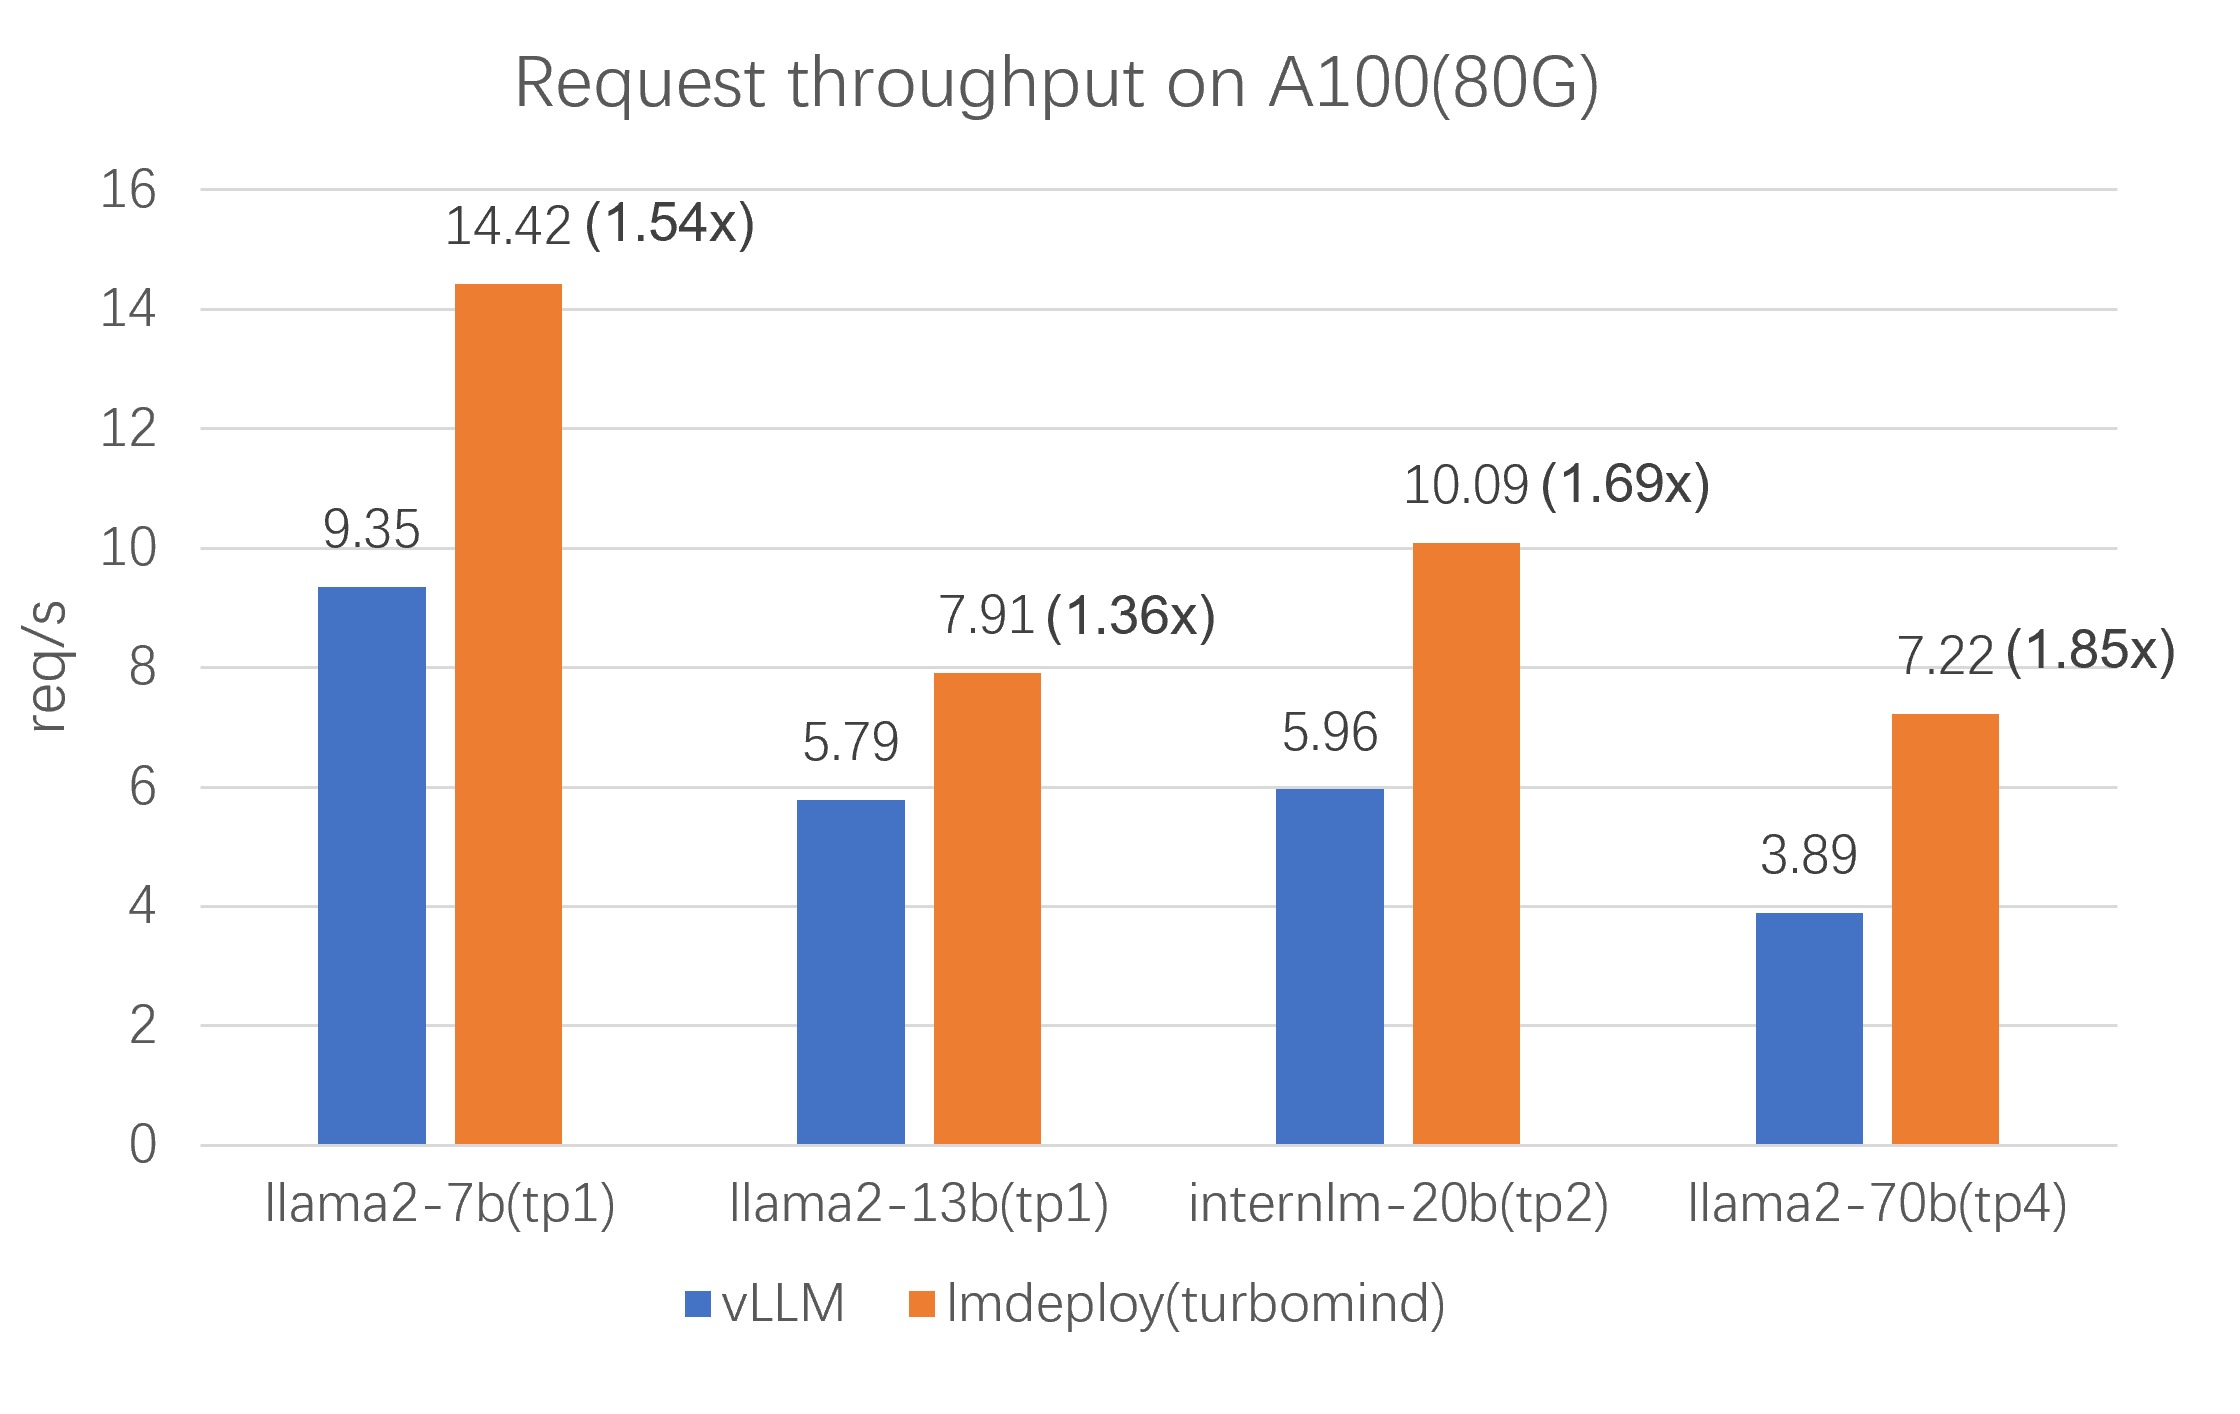 Here we can see LMDeploy's superior performance in the amount of requests per second that it can handle. This is important for reducing the costs of your deployment, and handling traffic spikes more smoothly.
Combining the performance benefits of LMDeploy with accessing affordable compute on Vast enables developers to ship AI applications quickly, affordably, and with low latency.
Setup and Querying
First, we setup our environment and vast api key
pip install --upgrade vastai
Once you create your account, you can go here to find your API Key.
vastai set api-key <Your-API-Key-Here>
For serving an LLM, we're looking for a machine that has a static IP address, ports available to host on, plus a single modern GPU with decent RAM since we're going to serve a single small model. We'll also search for cuda drivers 12.0 or higher for stability. We will query the vast API to get a list of these types of machines.
vastai search offers 'compute_cap > 800 gpu_ram > 20 num_gpus = 1 static_ip=true direct_port_count > 1 cuda_vers >= 12.0'
Deploying the Image:
The easiest way to deploy this instance is to use the command line. Copy and Paste a specific instance id you choose from the list above into instance-id below.
vastai create instance <instance-id> \
  --image openmmlab/lmdeploy:latest \
  --env '-p 8000:8000' \
  --disk 40 \
  --entrypoint "lmdeploy serve api_server internlm/internlm2_5-7b-chat --model-name internlm/internlm2_5-7b-chat --server-port 8000" \
This command sets up LMDeploy to serve the internlm/internlm2_5-7b-chat model on internal port 8000.
Connecting and Testing
To connect to your instance, you'll need to get the IP address and port number. Once your instance is done setting up, you should see something like this in the Vast.ai interface:

Click on the highlighted button to see the IP address and correct port for our requests.
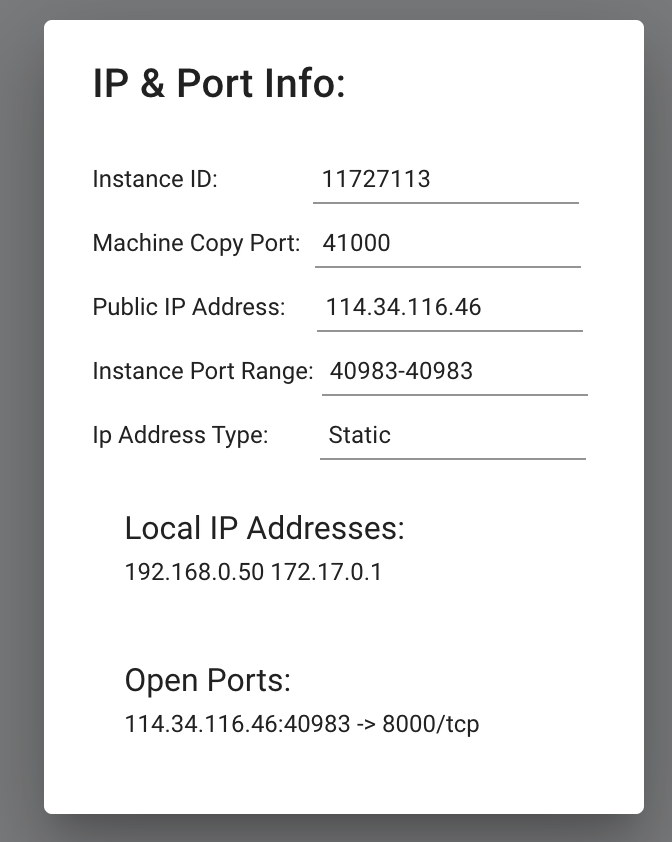
We will copy over the IP address and the port into the cell below.
curl -X POST http://<Instance-IP-Address>:<Port>/v1/completions \
     -H "Content-Type: application/json" \
     -d '{"model": "internlm/internlm2_5-7b-chat", "prompt": "Hello, how are you?", "max_tokens": 50}'
You will see a response from your model in the output. Your model is up and running on Vast!
In the notebook we include ways to call this model with requests or OpenAI
Running with OpenAI
We can interact with this model via the OpenAI SDK as well:
pip install openai
from openai import OpenAI

# Modify OpenAI's API key and API base to use lmDeploy 's's API server.
openai_api_key = "PASTE_YOUR_OPEN_API_KEY"

openai_api_base = "http://<Instance-IP-Address>:<Port>/v1"
client = OpenAI(
    api_key=openai_api_key,
    base_url=openai_api_base,
)
completion = client.completions.create(model="internlm/internlm2_5-7b-chat",
                                      prompt="Hello, how are you?",
                                      max_tokens=50)
print("Completion result:", completion)
Now you're all set up with super fast inference!


