Docs - Instance Setup
Templates
Vast.ai provides Linux Docker instances. A template is a saved set of initialization information that specifies what Docker image to load along with options that can only be set when the instance is created.
The primary instance configuration menu is accessible by clicking on the Templates link in the upper left navigation panel in the console.
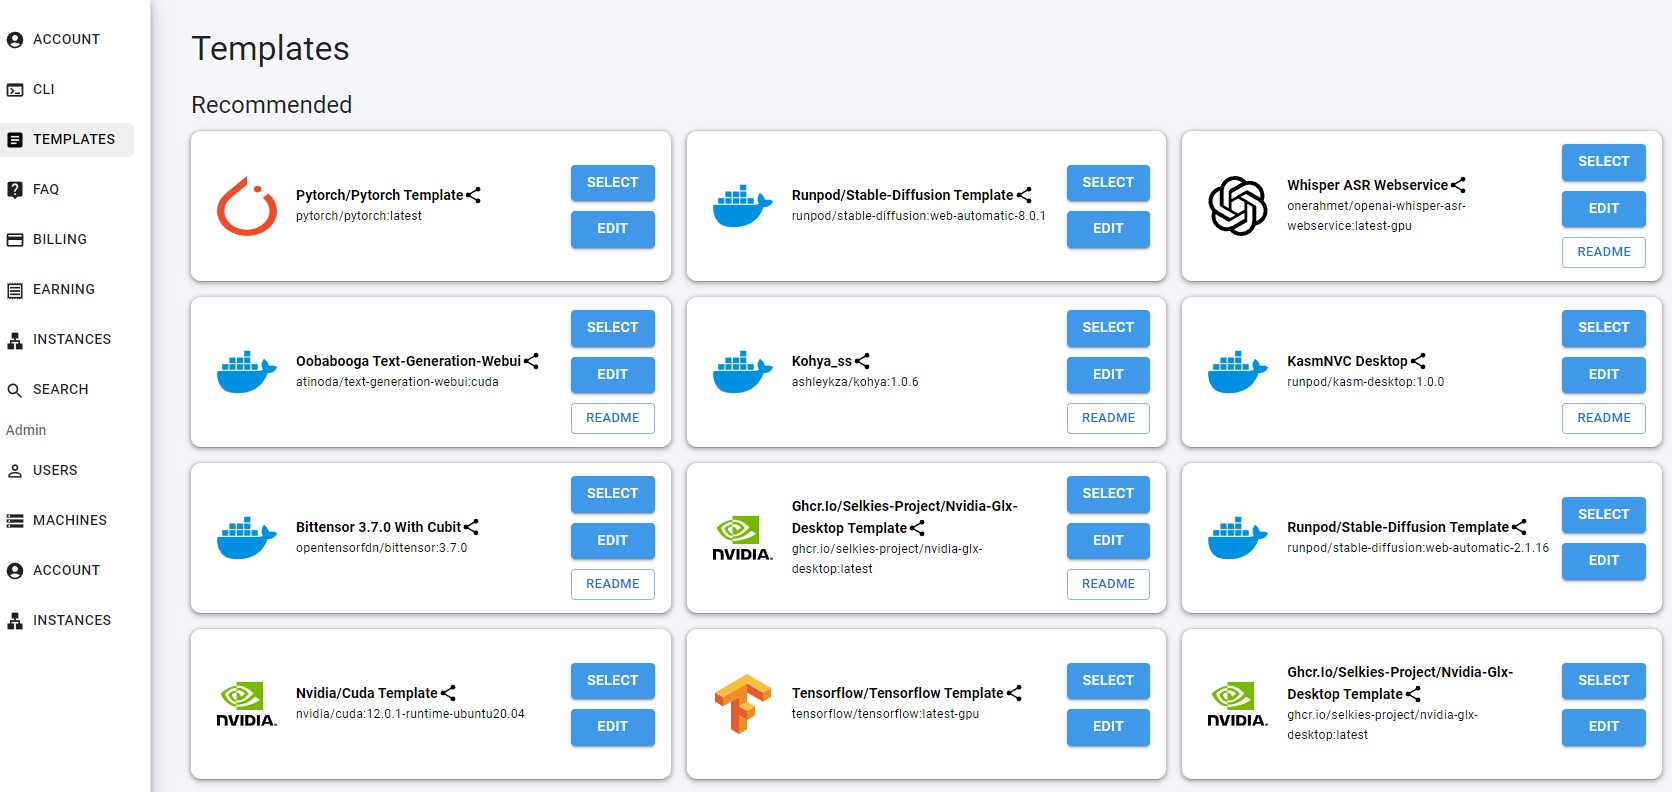
Recommended #
For typical use cases, we have recommended templates setup that will simply load a smart set of options for that use case. Simply click "select" to pick that template. Then you will be taken to the search interface to find a suitable GPU offer.
Popular #
The most popular templates used on Vast are in the popular section.
Recent #
The last template section is where your customized and selected templates are saved. Anytime you select a template, it is then saved in the "recent" section.
Referral Link #
Each template you create and make public can earn you referral credits with the referral program. The referral link for each template is shown as a share icon on the template page or as a hash that you can copy in the search interface template menu.
The benefit of using the template referral link is that the user you refer will have the template you shared to them selected and saved to their account when clicked.
The primary instance configuration menu is accessible by clicking on the Templates link in the upper left navigation panel in the console.
Template customization #
To customize a template, click the edit button to bring up the template editor. By editing any template, you make a new one. There is no way to delete a recommended or popular template. After you save your new template, it will appear in the recent section near the bottom.
Alternatively, in the search interface you can also customize your template. Click on the EDIT IMAGE & CONFIG button to bring up a configuration menu from within the search interface. Click on the most recent template (which is your selected template) to open the configuration menu.
From either interface, the settings are the same. For a complete explanation, see the section Docker Execution Environment for details on exactly what options are supported.
Specify a Docker image #
Enter the Docker image:tag from the Docker pull command. The interface will attempt to load the version tags from Docker hub and provide them as selections. As an example, to load the Ubuntu image with the latest tag the command would be:
ubuntu:latestDocker repository (registry) authentication #
Vast can connect to a custom docker repository and authenticate to that registry. Enter the registry information along with your username and password by scrolling down to the appropriate section.
Docker create/run options #
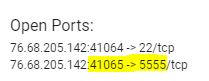
Vast supports port and environment variables from docker run options. To expose a port, add the port command to the docker run options line.
-p 5555:5555Adding that command to the run options would open port 5555 on the instance which will be mapped to an accessible external port on the machine. To find the mapped port, open the IP&Port info link on the instance after it is running.
It is also possible to change environment variables. For example:
-e TZ=UTCSets the environment variable for time zone to UTC so that the instance is now in the UTC time zone.
See also Docker Execution Environment.
Select a launch mode #
Vast provides a "launch mode" for the docker image which sets up SSH or Jupyter for connecting to the instance instead of a normal entrypoint process. After the instance starts, the GUI provides the SSH command or Jupyter link to connect to the instance.
Also supported is a normal ENTRYPOINT process which allows you to configure a docker run command and pass arguments. Unless you know you intend to use a docker ENTRYPOINT, you probably want the ssh launch type with an onstart script.
Direct vs proxy connections #
Vast offers both proxy (default) and direct connection methods for SSH and Jupyter launch modes. In general, the proxy connections use a Vast proxy server and work on machines without open ports. The proxy connections are slower for data transfer.
The direct connections only work on machines with open ports. When selected, the instance will open port 22 and/or 8080 when created. These direct launch modes are the preferred methods to connect and allow direct connections to the instance. Data transfer is faster and the connection is more reliable. Also because the machine has open ports, it is possible to copy data off the instance when it is stopped to local or another instance using the Vast CLI copy command.
Jupyter #
Jupyter is an interactive notebook interface that is very popular for AI/ML development using Python. Using Jupyter, you can connect to an interface in your browser and open any notebook that you can download as a .ipynb file.
We recommend this launch mode to start. We also recommend this launch mode over trying to run Google Colab with Vast. While Google Colab has a way to connect to a "local runtime", running Jupyter directly is more robust and less error prone if connections drop or the browser window is closed.
By default Jupyter instances use a proxy server. This is a simple setup that works on machines with or without open ports. The only downside is it can be slower to upload/download large files.
Jupyter direct HTTPS launch mode #
When selecting Jupyter there is a check box for "Jupyter direct HTTPS". When you select this box, you are then limiting your search to machines that have open ports, as you cannot run this option on machines without open ports. So your machine search will narrow.
Jupyter uses a browser interface, so to get the direct HTTPS connection to work, you will need to install a certificate onto your operating system.
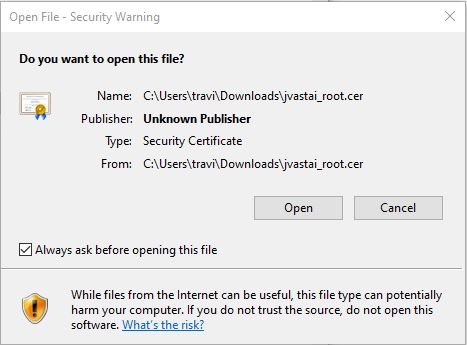
If you don't install the browser certificate, Windows and Linux will show a "Your connection is not private" Privacy error. It is annoying but you can click through by clicking "Advanced" and then proceed.
Installing the TLS certificate #
Start by downloading the certificate here. Then follow the directions for your operating system.
In most operating systems, double clicking on the certificate will start an installation wizard. You can also access the correct settings by clicking on the appropriate security settings in your browser.
Chrome on Windows
Open your Chrome security settings by clicking on the three dot menu in the upper right. Then click Settings. Then click Privacy and security on the left hand navigation. From that menu, select Security.
Click on "Manage device certificates"
Click Next and then click Import and find the downloaded jvastai_root.cer file.
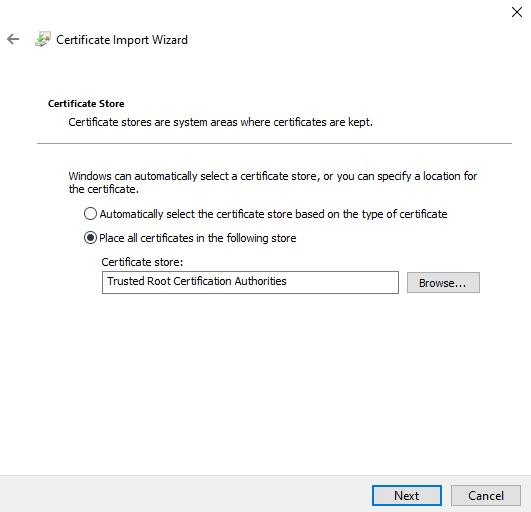
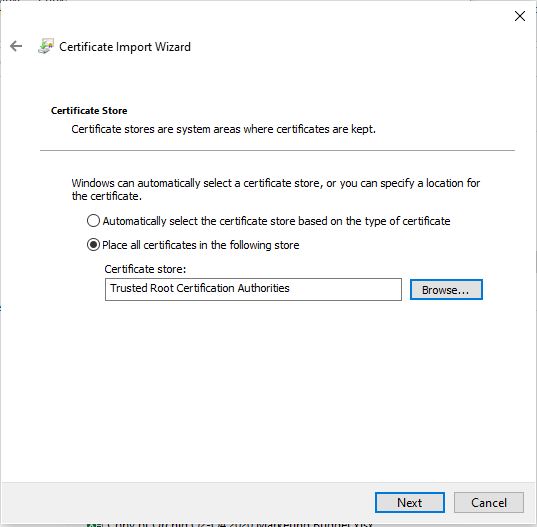
Click "Place all certificates in the following store" and then use the browse button. Click on the Trusted Root Certification Authorities folder.
- Click finish and agree to finalize the import. No reboot is necessary and all new instances created will then not have the warning pop-up.
Note that existing instances will still have the warning.
In most operating systems, double clicking on the certificate will start an installation wizard. You can also access the correct settings by clicking on the appropriate security settings in your browser.
Windows - General
- Click finish and agree to finalize the import. No reboot is necessary and all new instances created will then not have the warning pop-up.
Note that existing instances will still have the warning.
Windows - General
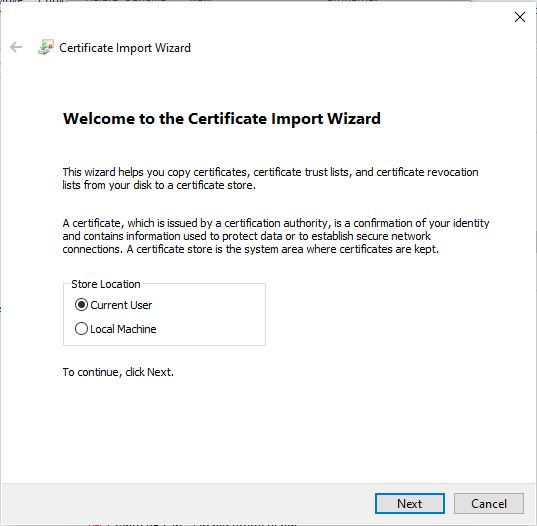
- Click on the "Install Certificate" button. Select either the current user or local machine and hit next.
Click "Place all certificates in the following store".
Click Browse and select the folder "Trusted Root Certification Authorities". Click OK. Then click Next. Click "Finish" to install the certificate.
- Click on the "Install Certificate" button. Select either the current user or local machine and hit next.
macOS
Double click the certificate after downloading it. Make sure that the Keychain Access application is opened and that there is an entry for Vast.ai Jupyter in the list of certificates. If it does not appear, then use the import button to manually import the certificate so that it appears in your list of certificates.
Double click the certificate after downloading it. Make sure that the Keychain Access application is opened and that there is an entry for Vast.ai Jupyter in the list of certificates. If it does not appear, then use the import button to manually import the certificate so that it appears in your list of certificates.
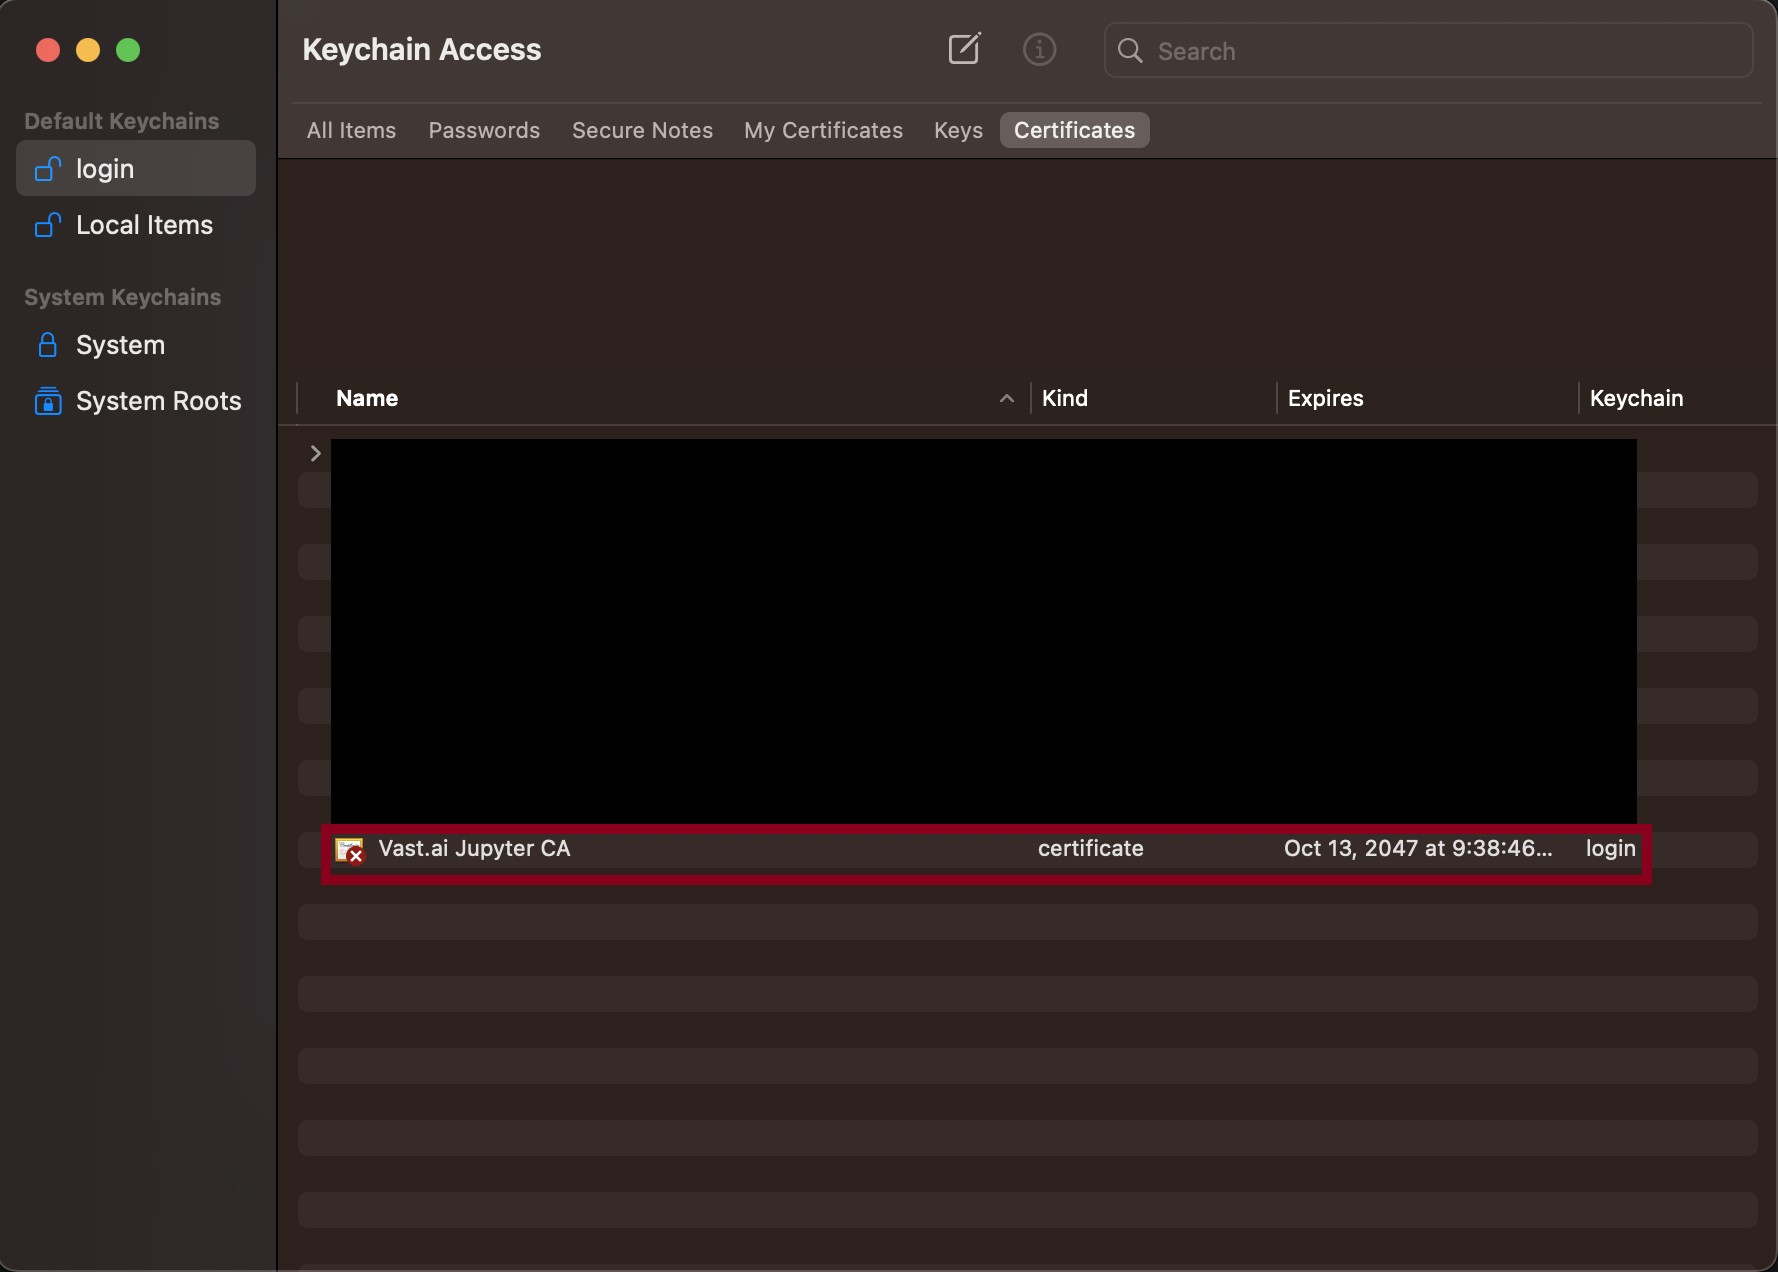
- Change the "When using this certificate" box to "Always Trust".
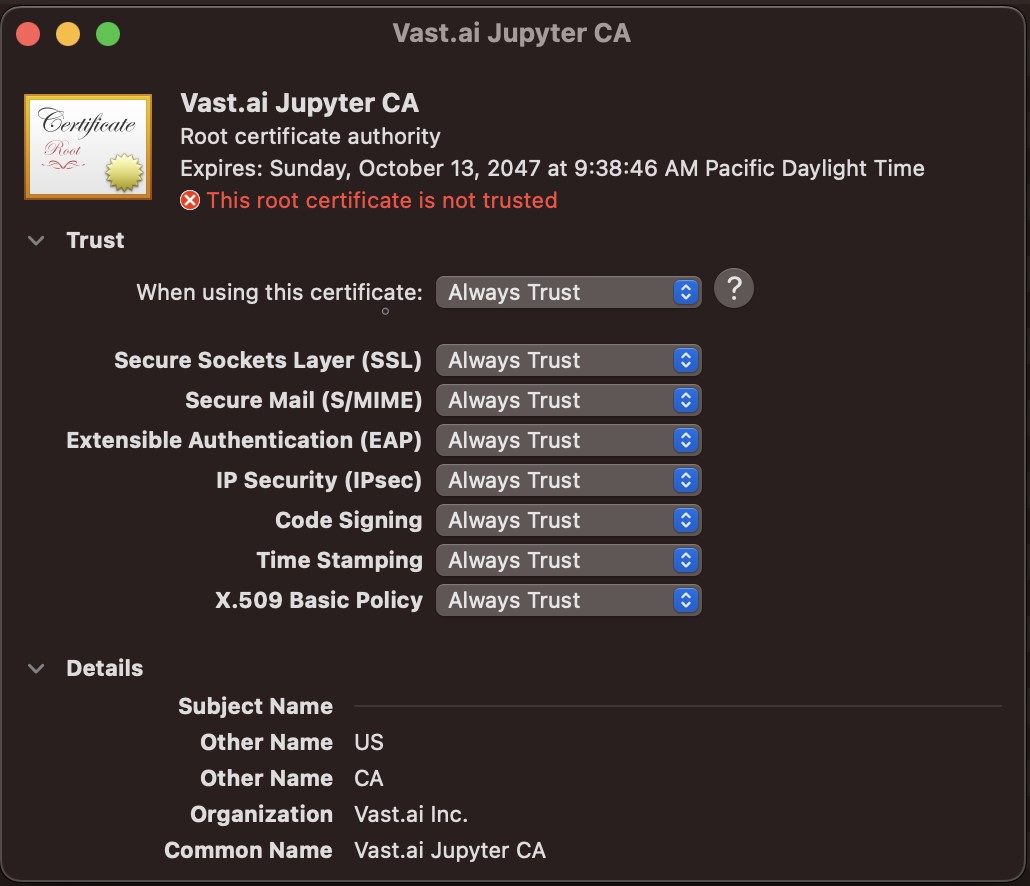
- Close the window. The change should take effect immediately for all instances you have running and create in the future.
- Close the window. The change should take effect immediately for all instances you have running and create in the future.
SSH #
Select this launch mode to connect to your instance using SSH. Once your instance is rented and starts, you will be given an SSH command that will have the right ports, hostname and settings to connect to your Vast instance.
On Ubuntu or Mac, first you need to generate an rsa ssh public/private keypair using the command:
ssh-keygen -t rsaNext you may need to force the daemon to load the new private key, and confirm it's loaded:
ssh-add; ssh-add -lThen get the contents of the public key with:
cat ~/.ssh/id_rsa.pubCopy the entire output to your clipboard, then paste that into the "Change SSH Key" text box under console/account. The key text includes the opening "ssh-rsa" part and the ending "user@something" part. If you don't copy the entire thing, it won't work.
example SSH key text:
ssh-rsa AAAAB3NzaC1yc2EAAAADAQABAAZBAQDdxWwxwN5Lz7ubkMrxM57CHhVzOnZuLt5FHi7J8zFXCJHfr96w+ccBOBo2rtBBTTRDLnJjIsKLgBcC3+jGyZhpUNMFRVIJ7MeqdEHgHFvUUV/uBkb7RjbyyFcb4BCSYNggUZkMNNoNgEa3aqtBSzt47bnuGqKszs9bfACaPFtr9Wo0b8p4IYil/gfOY5kuSVwkqrBCWrg53/+T2rAk/02mWNHXyBktJAu1q9qTWcyO68JTDd0sa+4apSu+CsJMBJs3FcDDRAl3bcpiKwRbCkQ+N63ol4xDV3zQRebUc98CJPh04Gnc41W02lmdqFL2XG5U/rV8/JM7CawKiIz3dbkv bob@velocityYou can use a few SSH keys by pasting in each on a new line into the account page.
The default SSH connection is made using a proxy. This method is slower, as it involves a bounce server, but it works on machines without open ports.
For Windows users, read our Windows guide on how to use Putty tools to SSH into a Vast instance.
SSH Direct #
This launch mode allows you to SSH directly into the instance. The speed of the connection is then only limited by your local machine's connection and the connection speed displayed on the instance card. The proxy SSH connection information is given as a backup, but it is typically slow.
On-start scripts #
For both Jupyter and SSH launch modes, you can paste in a script that will run Bash commands after the machine starts. Add a semicolon ; at the end of each command.
Entrypoint #
This allows you to configure a docker run command with a normal ENTRYPOINT process, instead of setting up ssh and remote access. You will not be able to retrieve the command's output. Unless you know you intend to use a docker ENTRYPOINT, you probably want the ssh launch type with an onstart script.
Select Disk Size #
When the instance is created, the disk size is set and cannot be modified. It is important to estimate how much disk you will need and then to move the slider to the desired disk size. The default disk size for an instance is 10GB. Use the slider to allocate more or less, taking into consideration that providers charge for disk allocation even when the instance is stopped.
Each template you create and make public can earn you referral credits with the referral program. The referral link for each template is shown as a share icon on the template page or as a hash that you can copy in the search interface template menu.
The benefit of using the template referral link is that the user you refer will have the template you shared to them selected and saved to their account when clicked.
## Common Questions
Can I change my template on an existing instance? #
You can't change existing instances - templates are recipes for new instances, so any changes to a template only effect new instances.