Docs - Team
Quickstart
Introduction #
This quickstart guide will walk you through how to create a team, invite some of your teammates, and then assign them to different roles.
The main advantage of a team is that you can collaborate on the same instances, autoscaling groups, and billing system without having to manage resources between accounts.
Creating the Team #
Note: Creating a team will automatically convert your Vast client/hosting account into a team account. This process is irreversible.
Log in to the Vast console using your usual method
Navigate to the Teams section on the navigation bar
Once, you are there you must fill out the short form to create the team

After successfully creating the team you should see the team dashboard
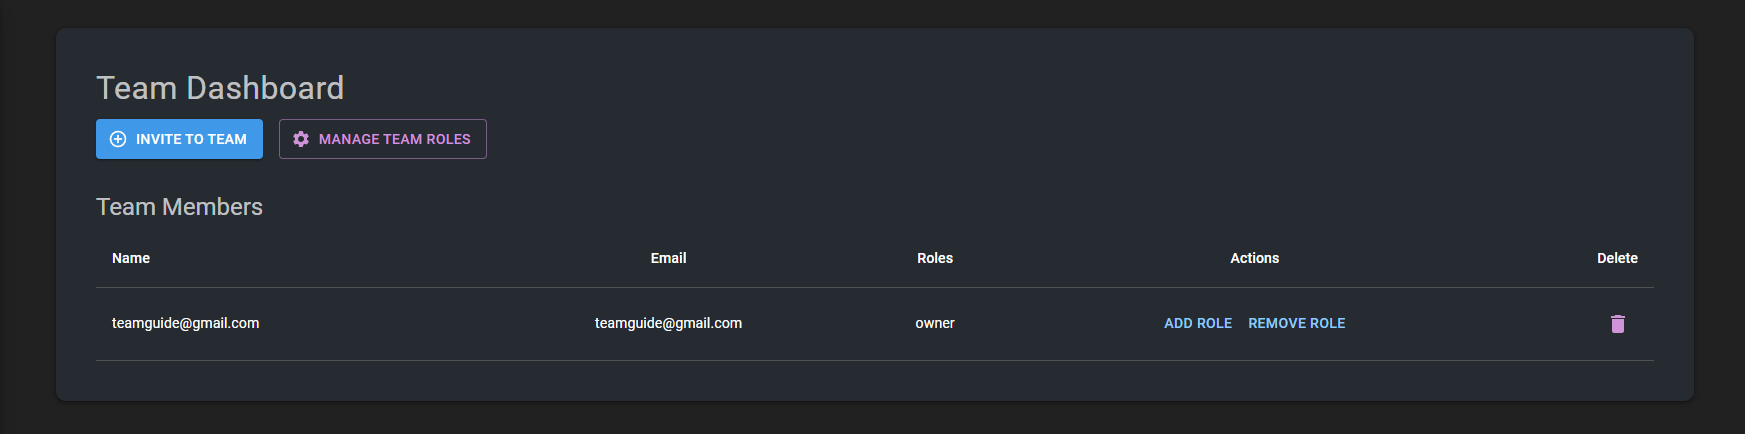
The team dashboard is the main way that team owners and team managers can interact with the team environment.
From here you can manage team roles, invite team members, remove team members, etc.
Managing Team Roles #
Every team by default comes with two roles manager, and member.
Managers have full access to team resources, while members have limited read access to most resources while still being able to rent instances.
You can learn more about team roles here
Inviting Team Members #
To invite a team member, go to the team dashboard and click the Invite To Team button
This will bring up a short modal asking for the email of the person you want to invite, as well as give you the option to select the role you want them to have
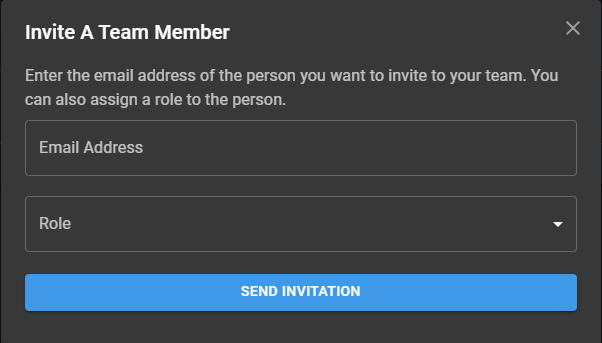
Once you send the invitation, the user should get an e-mail asking them to join your team. Upon clicking the link in the e-mail they will be added as a member to your team. New users must first register before being added to your team.

Conclusion #
You have now successfully created a team!
From here on you can invite as many of your teammates as you like and collaborate together with ease.