Docs - Use Cases
Disco Diffusion
Overview #
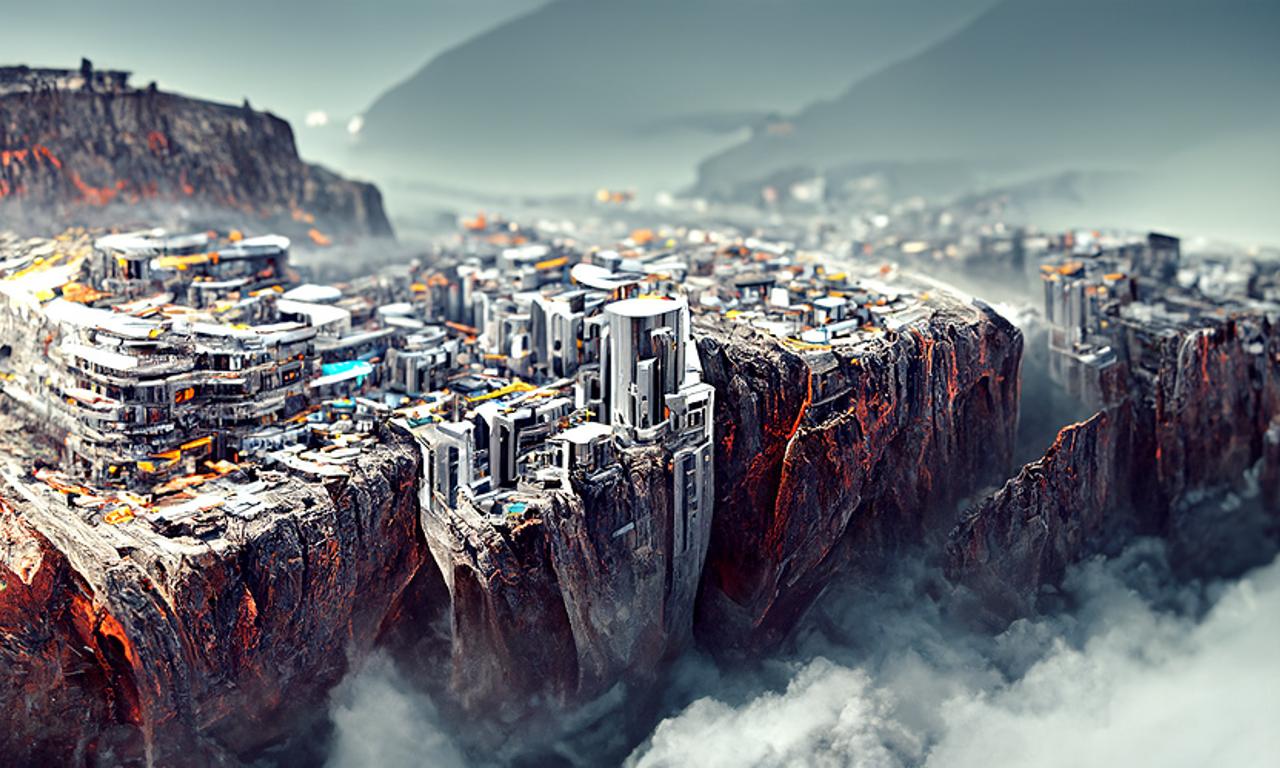
Disco diffusion is an incredibly powerful free and open source AI image generator, which is easy to use on vast.ai. With the right settings and powerful GPUs, it can generate artist quality high-res images for a wide variety of subjects. All of these images were generated purely through DD on vast.ai, without any other tools or clean up.
There are a few ways to run Disco Diffusion on Vast. The simple method is to use the pytorch docker image, plain vanilla jupyter and our slightly modified notebook which you download and then upload into your instance. The core of this guide will detail this method.
There is a custom docker image (fork) made specifically to run DD in docker- jinaai/discoart. Discoart can spin up somewhat faster and has a number of advanced features beyond the original notebook. Directions for using Discoart on Vast are here.
We have created a video guide that shows all the steps for using Disco Diffusion on Vast:
Pytorch image + Jupyter (recommended) #
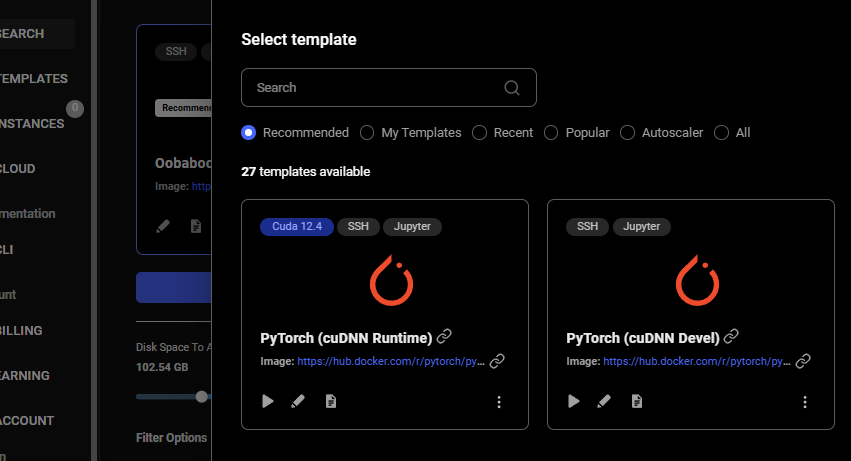
1) Select the docker image & config options #
Open up the vast console and click on the EDIT IMAGE & CONFIG blue button. Select the pytorch-pytorch image. Click again to open up the config menu. Then select the jupyter-python notebook option.
We also recommend checking the box for Jupyter direct HTTPS, although it is not required. To explain the tradeoff- direct HTTPS limits your search to machines with open ports which can be more expensive. HTTPS direct also requires you to install our TLS certificate or click through an "unsafe" warning on your browser. The big benefit is that you get faster download speeds and a more reliable connection. Leaving the box unchecked is fine, you will then connect to Jupyter through one of our proxy servers. It isn't as fast, but doesn't require any further setup.
2) Allocate more disk space #
Next you will want to allocate enough disk space. Under the EDIT IMAGE & CONFIG button there is a slider. The default of 10GB can sometimes not be enough. Move the slider up to 15GB or more, especially if you are making videos.
3) Select an offer #
Here is the fun part! You can now select the GPU you want to rent. For Disco Diffusion, leave the type as "on-demand" as you don't want to be interrupted while generating art.
The offers presented to you are limited to machines that can support your image configuration options. Further use the filters to pick a 1X GPU (Disco Diffusion doesn't support more than 1 GPU) and the GPU type. RTX 3090 is a great option. RTX A6000 has more GPU ram which is great for larger models but is more expensive. Other GPUs are also available.
Hover over the RENT button to get a breakdown of pricing. Once ready, hit RENT to generate an instance. The instance will now appear in the instances tab and will initialize.
4) Download the modified DD notebook as a .ipynb file #
The disco diffusion notebooks were created for colab. We made a few slight modifications (to install a few required libs) so they will run on vast.
Open the latest modified Disco Diffusion notebook here (5.6) and then file->download->download as ipynb. You then have the ipynb file on your hard drive. You can close the colab tab.
Here are all our modified notebooks: (5.6, 5.4, 5.2 )
5) Open the Jupyter instance #
Navigate to the instances in your account. You should see your instance booting up. Once it is ready, click on the OPEN button to open the Jupyter interface. Note that it can sometimes take an additional 30-60 seconds for Jupyter to start after the button appears. If you get an error, wait a while and then reload.

If you selected the HTTPS direct method you will get a browser warning. Install the vast cert to get rid of that or just click through it.
6) Run the modified DD notebook #
Once you can connect to the instance, you will see the Jupyter logo and a few files. Click on the upload button in the upper right and upload the .ipynb file from 4. Once that uploads, click on the notebook to open it.
If you are used to Google colab, the interface for vanilla Jupyter is similar with some differences. One thing you will notice right away is that there are no clean input boxes/check boxes for modifying the settings. Scroll through the notebook and change the settings in the code directly.
Review section 2. Diffusion and CLIP model settings to see if there are any clip settings you want to change. Getting into the specifics of matching CLIP settings to your GPU (and GPU RAM) is beyond the scope of this guide. Join the Disco Diffusion Discord for help.
Change the Prompts at the end of section 3. Doing a quick Ctrl+F and searching for 'A beautiful painting' is a quick way to find the prompt settings. Modify the prompt to whatever art you want to generate.
Now it's time to Disco!
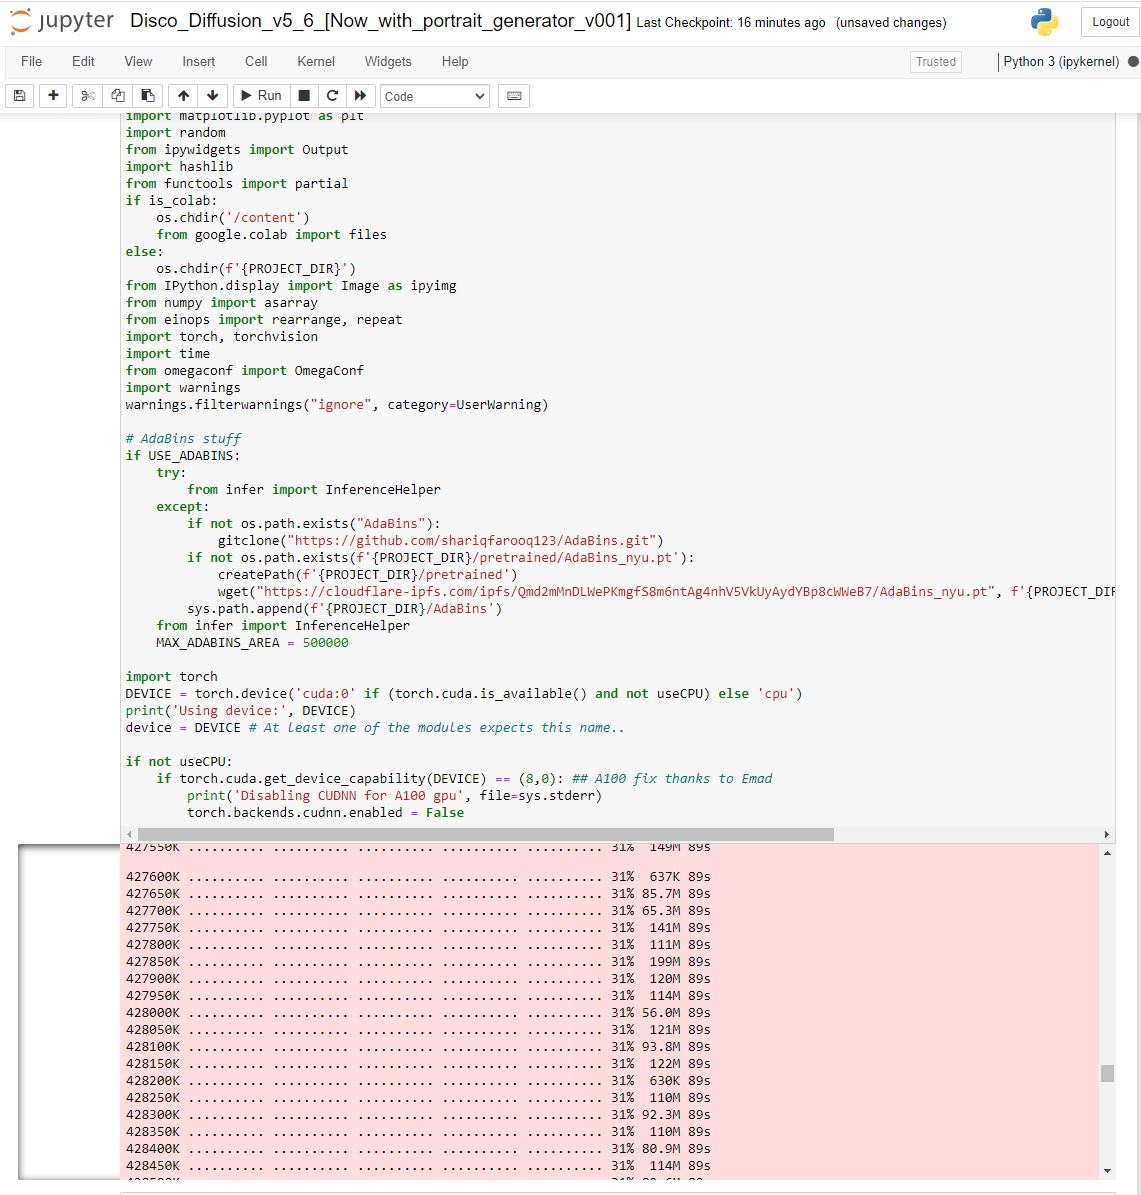
Once you have customized your settings, select Cell->Run All to start. The code will start to execute from top to bottom. The first couple of cells will install libs and download the CLIP models. This can take 5-15 minutes. The output of the code will appear in a text box.
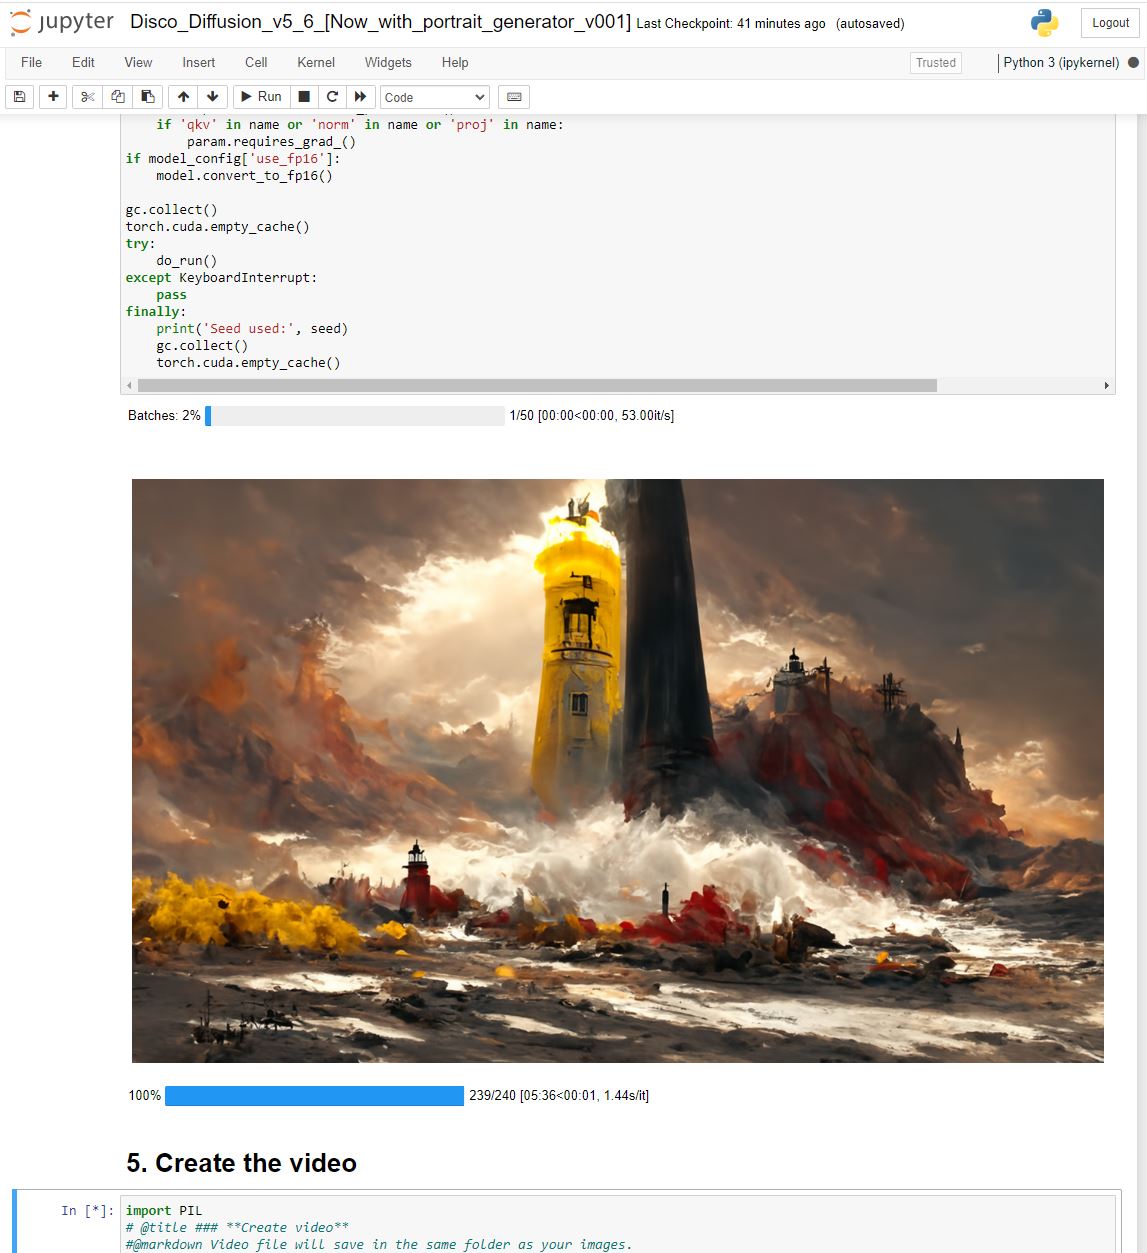
Scroll down to the bottom of the notebook to the end of step 4. Right above step 5 you should see the in-progress image.
7) Changing settings and downloading images #
After each image generates, it is placed into the images_out/TimeToDisco folder. You can then review your artistic creations. They are easy to download individually.
After a while you will want to change the prompt or settings. When the notebook is running, any changes that you make to it will not save. For example, if you change the prompt, the notebook will not start working off that prompt. After each setting change, you will need to hit the >> button to restart the kernal and then to run all the cells again. The second time through it will not need to download any models and so should be fast.
Zipping up all your images #
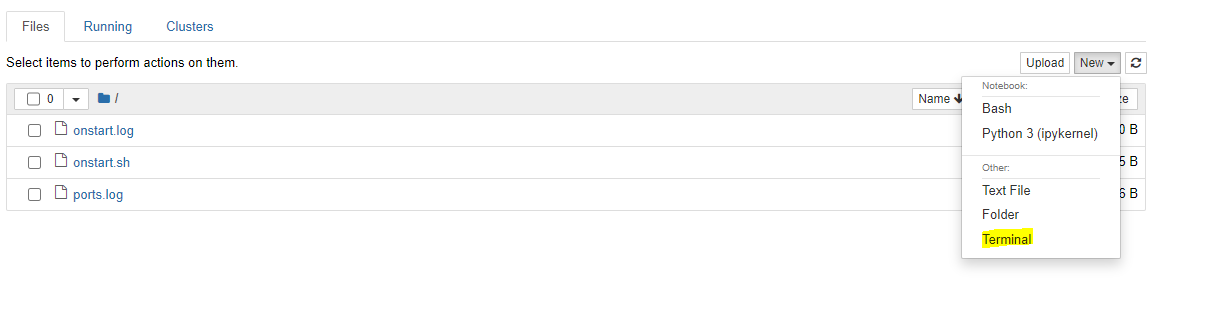
If you end up generating tens or hundreds! of images, there is a way to zip them up into a single file and then download them all. To more conveniently download folders or a number of files, you can use the command line zip tool. First open a new terminal by clicking New->Terminal:
Then in the terminal copy and paste the following:
apt-get install -y zipHit enter to run those commands which will install the tool. Then to zip all of the files in the default images_out/TimeToDisco directory:
zip all_images.zip images_out/TimeToDisco/*Note: do no use spaces in your folder names, they cause headaches on linux! Use the '_' underscore instead.
Additional help #
For discussion/help/advice running DD on vast find us on our discord, and make sure to check out the main DD discord .
Custom docker image - Discoart #
Instead of the pytorch image, you can use the custom jinaai/discoart docker image. Discoart can spin up somewhat faster and has a number of advanced features beyond the original notebook. To use it, the steps are similar but instead of picking the pytorch-pytorch image you select a blank template slot and then paste in the following docker image name:
jinaai/discoart:latestAlso in the second line, use the following option to set the ENV variable:
-e JUPYTER_DIR=/
Follow steps 2) and 3) to allocate more disk space and select an offer.
Discoart has the notebook installed already in the docker image. So once Jupyter starts, hit the connect button to connect to Jupyter. Install our TLS cert (if you haven't already) for the direct HTTPS connection or else you will get a browser warning.
Open the discoart folder and then open the discoart notebook. Change the prompt and any settings you want to modify. Then select Cell->Run All to start the notebook. The results should start to appear quickly because the custom docker image already has downloaded the models.
Examples using Vast.ai machines #